Building a smart home theater with Home Assistant
I don’t have a TV in my room, but I have a projector. Until now I used to watch movies on my wallpaper, but the wallpaper is textured so the image quality is bad. So I decided to buy a screen, motorized of course to integrate it into my smart home. I’ve chosen this one.
After installing the screen on the ceiling, I immediately tried it out. The first problem I had was the screen lowering itself too far (1
aspect ratio) but I wanted it to stop at an aspect ratio of 16. While some people claim there are potentiometers to tweak the endstops, I didn’t find them and as this can result in damaging the screen, I discarded this idea.Prerequisites
- Home Assistant set up with at least the MQTT-Component
- Know what a Sonoff is and how to flash it
Ideas on how to control the screen
The controller is a box between the power outlet and the screen itself, and has buttons to move the screen up and down and stop the movement:
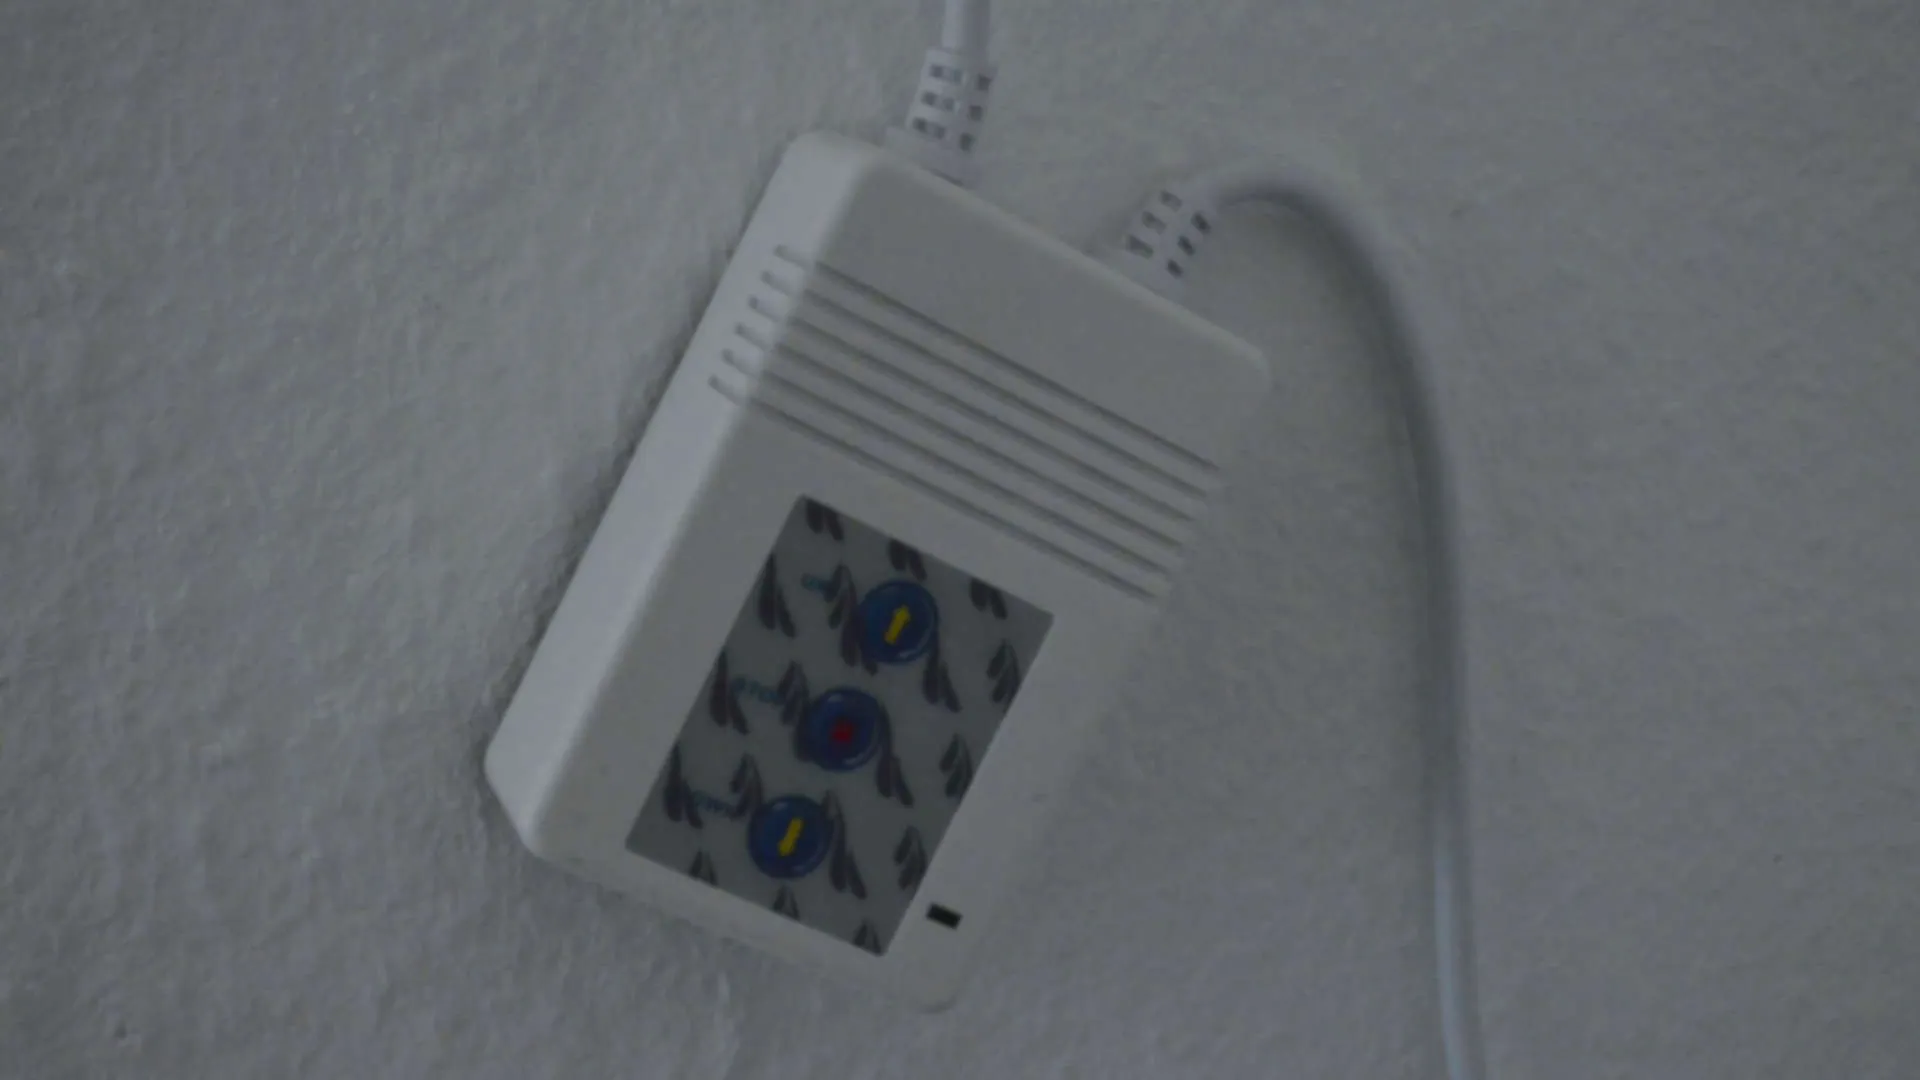
It also comes with a remote which has the same buttons as the controller.
While thinking about how to connect the screen to Home Assistant, I came up with three approaches:
- sending RF signals to the controller as the supplied remote does,
- adding an Arduino to “press” the switches on the controller via transistors,
- replacing the controller with a Sonoff Dual.
My screen came with a 315MHz remote, but this frequency is prohibited in Europe. If it were a 433MHz remote, I would have read out the signals the remote sends and then sent them via a cheap 433MHz transmitter attached to the Pi.
The second one is possible, but I didn’t want to tweak the official controller too much in case I would need it later on (e. g. selling it).
So I settled with replacing the controller, which is probably the cleanest solution of those three.
Connecting the Screen to Home Assistant
Upon inspecting my controller, I found out that there are two relays. One of them is active when the screen moves down, and the other one if it moves up. This means I will need a controller with two relays. As I had great experiences using Sonoffs, I bought a Sonoff Dual which has two independently switchable relays.

Later on, this device will switch on the relays when I want to move the screen. To implement this, I decided to use esphome.
esphome
esphome is a great library from Otto Winter and makes it easy to write sketches for hardware devices based on ESPs using yaml-files for integration with home assistant.
To install esphome, visit the official documentation.
Our controller acts like a garage door opener, and there is already a tutorial in the documentation here.
In this sketch, the relays are switched off after 60 seconds. I’ll use this to stop my screen when the aspect ratio is 16
, which, for me, was after 29.5 seconds.esphomeyaml:
name: my_screen
platform: ESP8266
board: esp01_1m
board_flash_mode: dout
wifi:
ssid: !secret wifi_ssid
password: !secret wifi_password
# Enable logging
logger:
ota:
api:
binary_sensor:
- platform: gpio
pin:
number: 10
inverted: true
id: button
on_press:
then:
# logic for cycling through movements: open->stop->close->stop->...
- lambda: |
if (id(cover).state == cover::COVER_OPEN) {
if (id(open).value){
// cover is in opening movement, stop it
id(cover).stop();
} else {
// cover has finished opening, close it
id(cover).close();
}
} else if (id(cover).state == cover::COVER_CLOSED) {
if (id(close).value){
// cover is in closing movement, stop it
id(cover).stop();
} else {
// cover has finished closing, open it
id(cover).open();
}
} else {
// state of cover is not known
if (id(open).value || id(close).value){
// cover is either opening or closing, stop it
id(cover).stop();
} else {
id(cover).open();
}
}
switch:
- platform: gpio
pin: 5
id: open
- platform: gpio
pin: 12
id: close
cover:
- platform: template
name: "My Screen"
id: cover
open_action:
# cancel potential previous movement
- switch.turn_off:
id: close
# perform movement
- switch.turn_on:
id: open
# wait until cover is open
- delay: 29.5s
# turn of relay to prevent keeping the motor powered
- switch.turn_off:
id: open
close_action:
- switch.turn_off:
id: open
- switch.turn_on:
id: close
- delay: 30s
- switch.turn_off:
id: close
stop_action:
- switch.turn_off:
id: open
- switch.turn_off:
id: close
optimistic: trueFlashing the sketch
The first time we want to upload the sketch, we need to connect a programmer. You can find a great tutorial on the Tasmota project page. After the first time, we can flash the device via Arduino OTA, so our controller can safely be mounted in a wall as we normally won’t have to physically access it again.

Connect everything and run esphomeyaml my_screen.yaml run. Look for the IP address and write it down, you’ll need it in the next step.
Setting up Home Assistant
Open Home Assistant and go to Configuration > Integrations.

Then, from the list, search for ESPHome and press configure.
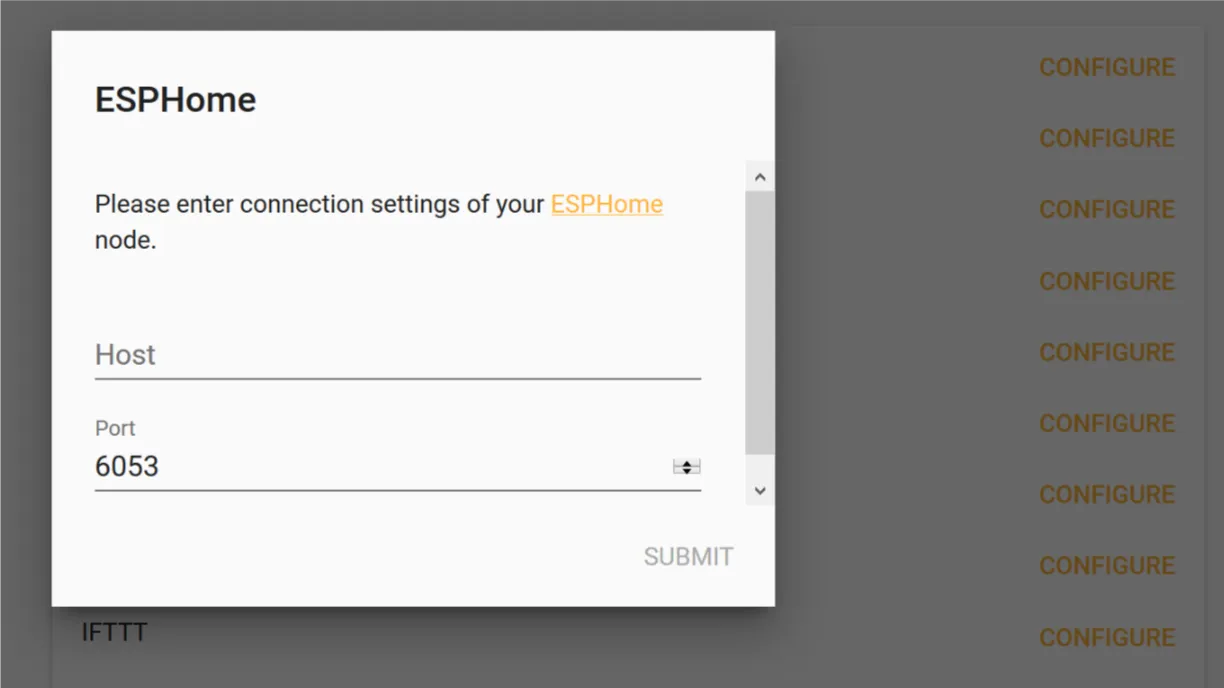
In the new window, enter the IP address of your ESP and press submit. There should now be a new integration which shows your cover entity.
Wrapping up

This solution obviously breaks all warranties, but this is okay for me as my screen only cost $100. If my screen had come with a 433MHz remote, I would have used an RF transmitter, but afterward, I think the Sonoff solution is more reliable. With a WiFi solution, the controller can send back its state so that Home Assistant knows if the screen moved down.
My screen moves before a door, and this door has a door sensor on it. Next time I will create a template cover that only opens the real cover when the door is closed to prevent damaging the screen. Stay tuned!
Update 2019/01/17: updated for new ESPHome native API
Update 2019/04/08: renamed esphomeyaml to esphome and updated links